You can successfully install the shower tray yourself - all you need is a step-by-step instruction that will guide you through the process. You will find such help in the article below. Additionally, we share our tips - thanks to them, your work will run quickly, efficiently and without problems. We invite you to read!
 The most important thing is the choice of shower tray
Before you start installation, make sure you have chosen the right shower tray. Pay attention to its size, shape and, above all, whether the drain hole is in the right place. Also adjust the height of the selected shower tray to the location of the sewage inlet. Make sure you have all the elements needed for installation, including: hooks, rails, legs, siphon and drain pipe. If you have not completed the entire set, you can do it easily by selecting parts from the offer of the same manufacturer. Additional recommendations from Onninen specialists can be found in our online wholesale store - they are included in the description of individual products. They concern, among others, the selection of the appropriate siphon, compatible with the selected shower tray.
Check out the wide range of shower trays in Onninen
Installation of a shower tray – materials and tools needed
What materials and tools will you need to install the shower tray? Below is a short list.
Materials
- Gaskets - will protect the drain against leaking.
- Sewage connection pipe - choose a product with a diameter of 50 mm (it should fit most connections).
- Siphon for a shower tray - choose a product that can be cleaned from the top. This will allow you to manually remove all impurities without clogging the drain pipes.
Tools
- Drill, screwdriver , expansion plugs/assembly glue - some models of bathroom shower trays can be installed with expansion bolts, others with assembly glue.
- Sealing silicone with a spreading gun - the choice of silicone color is free, but when working with sanitary ceramics, white and transparent ones are most often used.
- Spirit level and pencil - they will be useful at every stage of work when marking and measuring distances.
- Metal cutting saw (optional) - useful when shortening the connection pipe.
Where should the shower tray be installed?

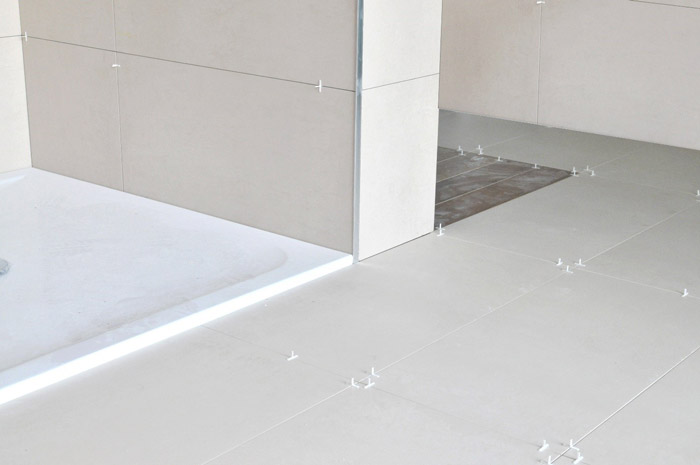
The shower tray should be installed in such an area that the drainage hole and the sewage inlet are not too close to each other. The distance between them should be moderate. Otherwise, it will be difficult for you to bend the flexible pipe properly. Also take into account the height of the sewage inlet - make sure that the shower tray covers it completely. Remember not to install the shower tray on a raw floor. First, line it with appropriate tiles, and if you are planning a different decor, use a screed under the shower tray instead of ceramic tiles. Thanks to this procedure, you will level the floor and make sure that the shower cabin is straight.
If you are renovating, the easiest way is to place a new shower tray in place of the previous one. You can also move it slightly, but taking into account the position of the sewage inlet and the drain hole. When designing the interior of a bathroom, you have many more options - the shower cabin can be placed anywhere (as long as it is close to the sewage inlet). Much depends on your individual preferences.
Check out the wide range of shower trays in Onninen
Step-by-step shower tray assembly instructions
How to install a shower tray? Below you will find step-by-step instructions.
- The first step is to determine the appropriate height of the shower tray - to do this, you should adjust the legs so that the entire structure sits evenly on the tiles. Then cover the legs with a cover panel - make sure it fits the set height. Then set the panel aside.
- Tighten all the legs and check again that they are the same height. Place the shower tray on the floor and check whether the structure is stable. Check for unevenness using a level - place it along the edge of the shower tray, and then diagonally (or radius - if you bought a rounded model).
- If you have a shower tray that is mounted with hooks - at this stage you can place them in the right places.
- The resulting structure should be tested. To do this, check again whether the masking panel fits the whole. Then check whether the shower tray does not wobble on its legs. Adjust them again if necessary. It is very important to make sure all parts are connected correctly.
- Mark the place on the floor where the drain will be located. This is where you will place the siphon.
- Then connect the lower part of the siphon to the flexible drain pipe, and connect it to the drain in the wall. Remember to maintain the proper slope. If the pipe is too long, use a saw to cut it in the appropriate place. Smooth the edges with sandpaper.
- Place the gasket on the bottom of the siphon.
- Place the shower tray in the right place. Then insert the upper part of the siphon into the shower tray drain and connect it to the lower part, which you previously attached to the sewage system. Be careful when installing subsequent seals - if any of them folds, the siphon may leak. Place the upper, aesthetic washer on the siphon.
- Perform a leak test. If nothing is leaking, glue the side panel to the shower tray and seal the edges with silicone. Wait until dry.

Installation of a linear drain
A low shower tray may have a linear drain instead of a classic drain. It is not only a designer and fashionable solution, but above all convenient for the elderly and disabled people who will use the installed shower tray. To install a linear drain, you must first design the bathroom appropriately. Low shower trays with this solution have a characteristic drainage structure that is several centimeters high. Therefore, make sure that you can "hide" the entire installation under your shower tray. Installing a low shower tray also requires comprehensive insulation of all edges in the bathroom that come into contact with water. For this purpose, use white or transparent silicone.
How to install a linear drain? Place the grid about 1 millimeter below the level of the ceramic tiles - to maintain the appropriate curvature, which will naturally "lead" the water to the drain. If in doubt, all the necessary information can be found in the manufacturer's instructions.
Shower tray installation and type – remember this!
Depending on the type of shower tray chosen, the method of installation may vary. What should you remember?
Installation of a shower tray on legs
When installing a shower tray on legs, remember that the most important thing is to set the appropriate height of the legs. Screw them on and then use a spirit level to check whether the shower tray is stable.
The advantage of a shower tray on legs or a frame is that the sewage elements do not have to be hidden in the floor - there is enough space under the shower tray to hide them.
Installation of a flat shower tray
It is best to install a flat shower tray in a newly built bathroom, the design of which takes this type of development into account. If you decide to install such a shower tray in a bathroom where it was not previously included, you must be prepared to cut the floor for the required installation or raise the floor level.
The floor for a flat shower tray must be even - this affects the safety of the installation and the everyday comfort of bathing.
Installation of a shower tray on Styrofoam
Mounting the shower tray on Styrofoam ensures excellent thermal and acoustic insulation. It differs from the installation of a flat or leg-mounted shower tray.
You should start the work by cutting the Styrofoam support and cutting a hole in it for the drain. The next step is to connect the siphon to the drain pipe. Place the shower tray mounted on a Styrofoam support in the appropriate place and then tighten the upper part of the siphon. After checking the tightness of the connection, cover the bottom of the carrier with tile glue or mounting foam and glue it to the substrate. We finish the sides of the shower tray at the very end.
How much does it cost to install a shower tray?
If you are wondering how much it will cost to install a shower tray yourself, below is an approximate cost estimate.
- Corner shower tray with legs (depending on dimensions and material used) - from PLN 295 to PLN 1,337.
- Sewage pipe (flexible, connection) - about PLN 5.
- White sanitary silicone in a set with a gun - about PLN 18.
- Siphon for a shower tray (depending on the diameter and the presence of a drain pipe) - from PLN 21 to PLN 126.
Summary
We hope that thanks to our advice, you will be able to install a shower tray in your bathroom quickly and efficiently. If you are still looking for the perfect product, visit our online store. You will definitely find shower trays worth your attention there.