Modern, built-in shower drains are increasingly replacing traditional shower trays. No wonder - these solutions are more aesthetic, safer and do not limit valuable space. Which drain should you choose for your bathroom ? How to install it properly? Check out our guide!
From this article you will learn:
- How do shower drains work?
- What types of shower drains are there?
- How to properly install a shower drain?
- What should you pay attention to before purchasing drainage?
- What are the characteristics of linear and point drains?
How do shower drains work?
Shower drainage has a simple task - draining water flowing from the shower head. Therefore, it is an essential element of every cabin . Basically, you can choose between two solutions: a traditional drain in the shower tray or drainage installed directly in the floor. In the first case, the user has little choice because the drain is built into the shower tray. The possibilities open only with the second option .
Types of drainage – linear drain and point drain
The drain installed directly in the floor allows you to arrange the interior of the cabin according to your preferences. It works especially well in small bathrooms. Thanks to it, you can avoid plinths or thresholds, creating a barrier-free bathroom . This is especially important when the cabin is used by children, elderly or disabled people. A shower drain installed in the floor is not only impressive, but also aesthetic , which is why it appears more and more often in modern bathrooms.
When choosing shower drainage installed in the floor, you can choose:
- point drain (with a low shower tray or directly in the floor),
- linear drain (in the floor, at floor level throughout the bathroom).
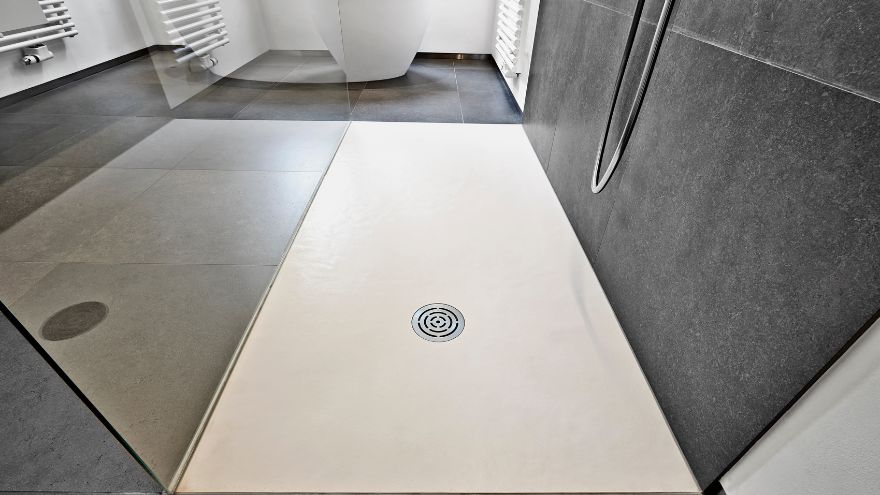
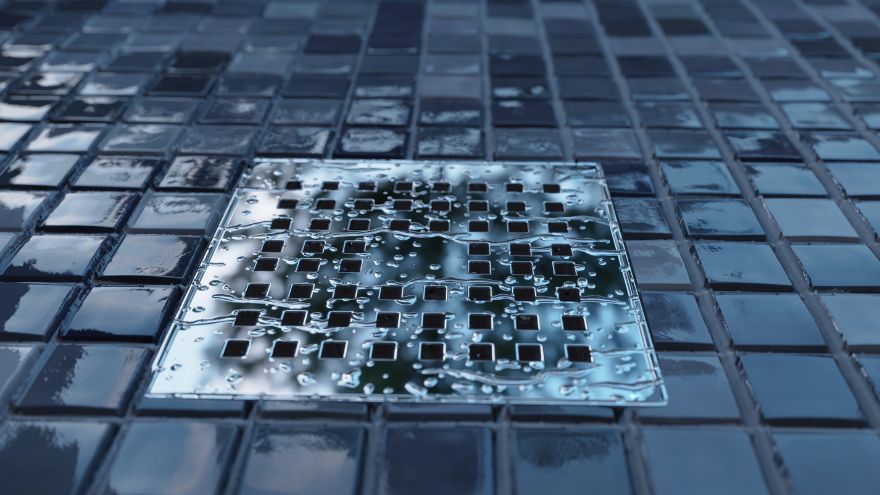
Point drain – characteristics, application
Point drains installed in the floor plane are commonly referred to as sewage grates. Their main elements (inlets and manholes) are placed in the ground, where they connect to the sewage system. Point drainage is most often used to drain water from low-sloping surfaces. They enable quick cleaning of large surfaces and are easy to maintain.
 Point drains are installed in thick ceilings. They drain water effectively, but they are not recommended everywhere. In bathrooms in houses and apartments, they are installed less frequently, usually in larger rooms, in the center of the shower cabin floor. To make this solution more universal, flat siphons are available on the market, better suited to low shower trays and drains at floor level. They limit the depth of digging into the floor.
Point drains are ideal for spaces such as workshops, studios, industrial rooms, swimming pools or gardens (e.g. as a tap sump in the garden, drainage for a steep entrance or internal, deep parts of the property). A much more common choice for a home shower is a linear drain.
Linear drain in the shower
Linear drains have an elongated shape and do not take up much space. They are responsible for gravitational water collection and discharge to the sewage system through a siphon made of metal or plastic. This is due to the slight inclination of the surface towards the drain. They are comfortable, easy to clean and use.
Linear drains work well in minimalist, modern bathrooms and small-sized shower cabins . They are most often chosen because they are slightly easier to install and have interesting aesthetics. They are mounted on the floor, on the wall (wall linear drain) or at their junction. There are also non-standard linear drains in corner and arc shapes on the market.
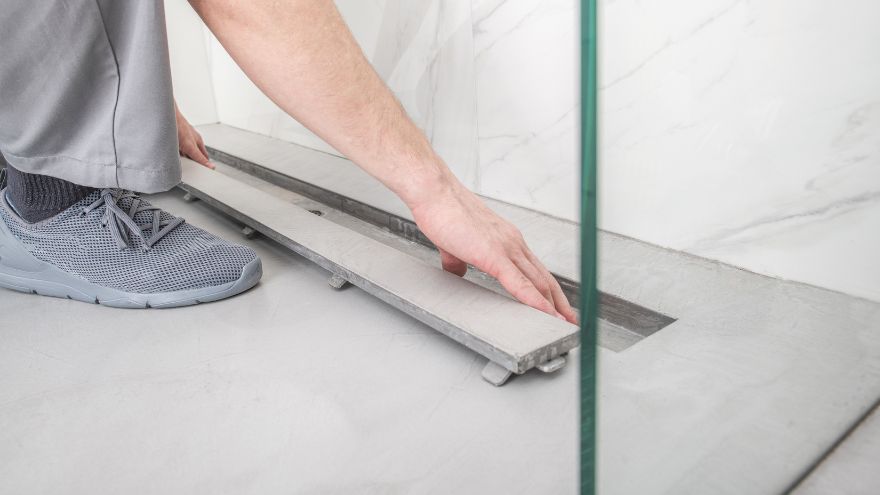
How to install shower drainage? Installing a linear drain step by step
You can entrust the installation of a shower drain to a professional or do it yourself. Below we present instructions for installing a linear shower drain in 5 steps. We chose this type because it is the most frequently chosen solution in shower cabins in apartments and houses.
Approach installation
Start by installing a sewer approach. Beforehand , check the type of flooring that may be on:
- ground,
- densely ribbed ceiling,
- monolithic or reinforced concrete ceiling.
In the case of a floor on the ground, the assembly includes: setting the approach, concreting, placing the siphon and screeding.
On a densely ribbed ceiling (the most common in single-family houses), the approach is installed in the thickness of the ceiling, during its construction or before it is concreted, creating a gutter for all connection elements.
In a monolithic (or reinforced concrete) ceiling , the approach is made under the ceiling and masked (e.g. with a plasterboard suspended ceiling) or the floor is raised according to the shower. Regardless of the type of ceiling, the slope of the discharge pipes towards the drain should be approximately 2.5%.
Installing the drain and setting the slopes
In the case of point drains, the slope is envelope-shaped, so there are falls on all sides. The linear drain can be installed with a one-sided inclination (in the wall) or two-sided inclination (in the middle) . Regardless of the installation location, remember that:
- the drain must be located above the connection to the sewer line,
- the grid (drain grate) should be located approx. 2 mm below the level of the tiles.
Also take into account the thickness of the adhesive mortar and tiles .
Bleed setting
When setting slopes, follow the drain manufacturer's recommendations. As a standard, the slope should be a minimum of 2.5% (lowering the floor by 2.5 cm per 1 meter towards the linear drain) and cannot intersect with the ceiling beams . The slope is formed from an approximately 5-centimeter layer of screed laid next to the formwork. Adjustable legs included with drains by many manufacturers are most often helpful in setting the angle of inclination.
Installation of a siphon and sewage drain
Connect the sewer drain siphon. Finish the installation by checking the tightness. If nothing is leaking, level the floor with a layer of concrete.
Finish
Secure the drain rosette with sealing tape. Place waterproofing - a liquid foil, which you apply with a brush or roller - on the floor and walls (height 1.5 m, among others). Secure the corners with sealing tape. Start laying the tiles. It is best to choose anti-slip, small-format and non-porous tiles with abrasion class III or IV. Finish everything with a waterproof grout.
Check out all the drainage systems offered by the Onninen wholesaler
What should you pay attention to when purchasing a shower drain?
When purchasing a drain, consider the following parameters.
Dimensions and installation depth
 Adjust the first one to the size of the cabin or other room, the second one - to the thickness of the alloy in which you will install the drain.
Tightness
Safe water drainage is essential. The tightness eliminates the risk of mold and fungi development . The best in this respect are models with a single gutter, without welds and joints in the structure, or drains integrated with a sealed slope slab.
Siphon capacity
Good throughput for home use is at least 30 liters per minute (0.5 l/s) . The throughput should be matched to the efficiency of the fittings.
Durability
Good drainage elements should be made of stainless steel , so they will not corrode even during frequent contact with water. This material is used in most models, and apart from practical aspects, it also looks much more aesthetic than plastic .
Stability
When purchasing a linear drain, pay attention to the number of mounting legs . The more, the better the stability, i.e. the less risk that the element may move when you take a shower.
Easy to clean
It is good if the product has a removable grid that makes cleaning the gutter easier. At home (especially if you have long hair or bathe animals), it is worth choosing a model with a removable siphon or strainer that retains most of the dirt . Before purchasing, also check whether the product can be cleaned with strong detergents and preparations based on sodium hydroxide.
Appearance
A shower drain can become a decoration. This is mainly determined by the appearance of the grille. Some drainage areas can be covered with tiles, others can be illuminated with light-emitting diodes (LEDs).
Choose a shower drain in Onninen!
You now know which drains are better for specific applications. A much more common and practical choice is a linear drain , but of course in each situation it is worth considering which solution will fulfill its role better. We hope that our guide helped dispel any doubts and help you make a decision. Examples of products helpful in implementing investments related to the construction of a shower drain can be found in our wholesale store:
- Geberit CleanLine20 linear drain – easy to clean, suitable for ceramic floor tiles with a thickness of 8–35 mm, adjustable in height, inclination and groove offset of the line;
- Purus DRAIN Designe linear drain – low-rise, with a cover made of stainless steel and with a 5-year manufacturer's warranty;
- Kessel Linearis Compact linear shower drain - high-quality side drain with an aesthetic surrounding frame, integrated adjustment set and reversible cover;
- Schedpol linear drain 80x80x5 / 12 cm - highly durable and tight, factory integrated with a slope tile, simple and quick to install.
Check out all the drainage systems offered by the Onninen wholesaler