More and more people are opting for underfloor heating. It must be admitted that this solution has many advantages. First of all, it provides comfort and convenience of use, while the heat rising from the bottom evenly heats the entire room. Today we will show you how to perform the installation step by step.
Check out KAN-therm products for underfloor heating at the Onninen wholesaler
How to lay underfloor heating yourself?
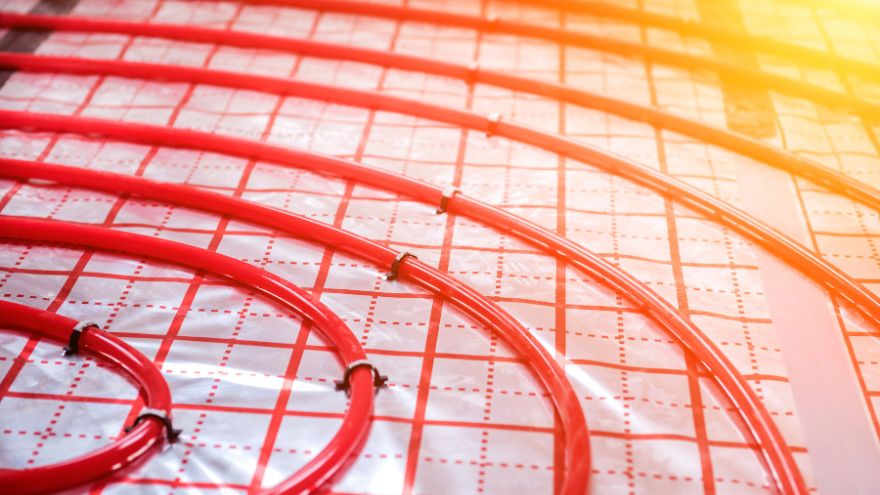
Underfloor heating is a really good alternative to traditional wall radiators. It is important to remember that for it to work properly, proper installation is important. First, you need to choose the right project. The most effective solutions should be taken into account. Here, you need to take into account the type of flooring or 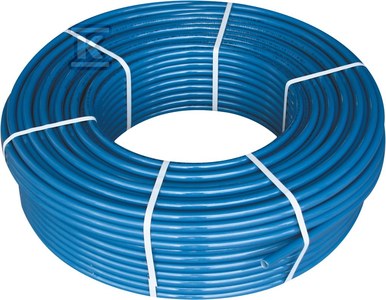 also the arrangement of permanent decorative elements. Already at the design stage, the question of which pipes are worth choosing should be answered. You can choose copper pipes, which are durable and resistant to high temperatures, or choose those made of plastic, e.g. polypropylene, which are also durable and flexible. Copper pipes are definitely more expensive. Laying each pipe should begin by attaching one end to the supply manifold. In the next stage, the pipes are gradually led by unwinding the rolls and immediately fastening them to the substrate with special holders. It is necessary to maintain the established distances between adjacent sections. The standard spacing is from 10 to 20 cm. The optimal length of the pipes must also be used. Underfloor heating creates a loop of individual pipe sections, and this loop should not be longer than 150 m, because otherwise it can cause high hydraulic resistance. The pipes are always led in a specific way, creating a spiral, so that the subsequent rows have alternating supply and return sections. The manifolds are always installed in pairs, i.e. supply and return. The first one supplies water from the boiler room, while the second one drains it back to the boiler room.
What do you need for underfloor heating?
When preparing underfloor heating, you need to remember how important the right tools and accessories are. The first one is a floor heating distributor . Here, you need to choose a model depending on the demand for circuits. Another important element is a regulation set, as well as an insulating foil for the underfloor heating . Here, we recommend a product made of polyethylene and polypropylene foil. It is durable, perfectly protects the cement mortar from moisture. During installation, it also reflects heat rays, which prevents heat loss. A compression connector is also useful, which is selected to the size of the valves. You also need to focus on underfloor heating pipes or mounting rails. For even greater convenience of use, a thermoelectric head is used, and clips are useful for mounting.
Underfloor heating - step by step installation
Installing underfloor heating requires precision. It takes place in several steps.
- Step one: preparing the substrate and insulating the heating
Before we move on to the full installation of the heating, we need to prepare the substrate. It must be thoroughly cleaned, leveled and dried, because otherwise, after pouring the screed, mold and mildew may appear. They are not only harmful, but will also cause the underfloor heating to work inefficiently.
- Step two: laying the foil
Once we have thoroughly cleaned the surface, we can proceed to laying the insulation with a damp-proof foil. After securing it, we lay the polystyrene, and only then another layer of foil with an anchoring mesh to secure the pipes.
- Step three: installation of heating circuits
This is one of the most important elements of the underfloor heating system. One circuit should be a maximum of 100 meters. If it is longer, the heating may not work properly. Pipes are attached to the underfloor heating using special clips, while the ends of the pipes are connected to the water distributor.
- Step four: performing a pressure test
After attaching the pipes, we carry out a tightness test by injecting pressurized water into the pipes.
- Step five: making the perimeter expansion joint
Foam tape should be placed around the perimeter of the room. Be sure to place expansion gaps under the power cables, not over the loop.
- Step six: filling the underfloor heating system with screed
At the very end, we make a concrete screed. Remember that for about 3 weeks after pouring the screed, the room should have a moderate temperature and low air humidity.
KAN products are recommended for underfloor heating
It is worth choosing a product such as the PERT/AL/PERT 16x2 pipe . It is made of polyethylene with increased thermal resistance. In addition, it has an aluminum jacket, which is butt-welded. It is resistant not only to high temperature, but also to loads. The PERTAL ultraPRESS - 40x3.5 pipe will also be a good choice. It is a mandatory part of underfloor heating. It has high thermal resistance and also ensures maximum tightness. You can also decide on a product such as the PE-RT/AL/PE-RT multilayer pipe. It is also necessary in the case of creating underfloor heating, it ensures efficient operation of the installation. It is dedicated to both hot and cold water installations. The product is dedicated to underfloor heating with a working pressure of up to 10 bar. Each of these products will meet the expectations of the most demanding.
Check out KAN-therm products for underfloor heating at the Onninen wholesaler