Channel radiators are becoming increasingly popular. It must be admitted that such a solution is not only effective, but also allows you to maintain an even better aesthetic of the room. Today we will tell you how to install a channel radiator. We will consider whether such a solution is a good choice in an apartment in a block of flats. And at the end we will present you the top 3 really good models.

Check out the duct heaters at the Onninen wholesaler
Step-by-step installation of a duct heater
The duct heater is placed in the floor. Thanks to this, it is almost invisible. It is most often mounted by the terrace door, it does not interfere with the free opening of the terrace. This solution works very well in both large and smaller rooms. Thanks to them, you can easily and quickly maintain the right interior temperature, and at the same time, the heating costs are not very high. Now that this is clear, we can move on to the installation.
Step One: Planning
Before we start the installation, it is worth planning the assembly. Remember to leave some free space. About 3-4 cm on each side is enough. You need to prepare an opening in the floor layers. You need to choose it for the size and power of the radiator. The width of the channel is also the width of the bathtub and the insulation layer. At the same time, you need to add about 2 cm to the length of the bathtub, 1 cm for the expansion of the upper part of the bathtub side on each side.
Step two: making the channel
There are two ways to make a channel in the floor. For example, you can board up the entire opening, but take into account the space for insulation layers. You need to insert spacers between the boarding, because this will prevent the opening from narrowing. An alternative to this solution is to insert a bathtub with spacers. The upper part must be secured with expansion tape. Only then can we lay the screed for the bathtub. While the screed is drying, the radiator's bathtub must be removed and polystyrene must be inserted in its place, and when you are installing a radiator with a fan, you must inject mounting foam.
Step three: installing the radiator tub
The bathtub and radiator should be installed only before the flooring works, and the bathtub frame must rest on the screed. Thanks to the screws placed on the bottom, the bathtub is stabilized. Remember also that it is only before the frame that it is necessary to make an expansion joint with silicone or cork. The bathtub should be installed on a layer of lean-to and thermal insulation. If you are planning a low radiator, you will easily fit at the height of the floor screed, however, if the radiator is high, it will be necessary to sink a channel under the bathtub.
Step Four: Preparing the Plumbing System
Now we can start preparing the plumbing system. We do it on lean concrete, then we lay a waterproof layer of foil and thermal insulation. This solution prevents heat loss to the ground, and the minimum thickness must be 5 cm. We can use hard thermal insulation materials such as polystyrene, mineral wool, or low-pressure assembly foam. We still need to lay a technological spacer on the thermal insulation.
Step Five: Installing the Heat Exchanger
Now we can install the heat exchanger and modules. We still check if they work properly. Finally, we install the platform. We match it to the material the floor is made of. We also remind you that you need to match the grate to the size of the radiator and that's it.
Channel radiator in a block of flats - is it a good solution?
 Many people wonder whether a duct heater can be installed in a block of flats. Well, such a solution will not work for residential areas, because it would require a lot of interference in the ceiling, and for this you would have to obtain a permit, e.g. from a housing cooperative. However, if you really apply for a permit and obtain it, it is worth choosing the Regulus Quattrovent fan heater . Channel heaters are often installed in modern developer apartments. They are then a good alternative to traditional radiators.
Regulus Channel Heaters - Top 3 Efficient Models
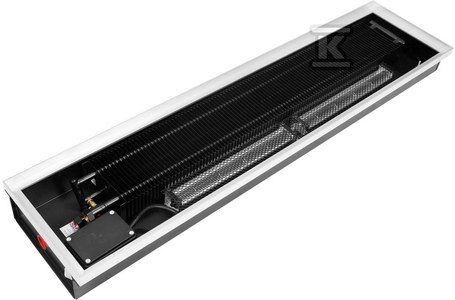
Top 1: QUATTROVENT Regulus channel heater
QUATTROVENT Regulus channel heater is a perfect replacement for classic panel radiators or underfloor heating.
 At the same time, it will not only quickly but also effectively heat the room. It is equipped with an easy-to-control heating element. If you place it along the window space, it will act as an air curtain, namely it will protect against the inflow of cold air through leaky windows. This model has a very high heating power.
Top 2: TRIOVENT Regulus channel heater
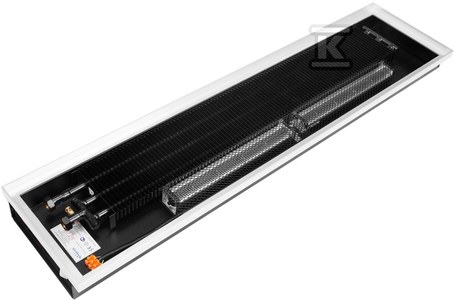 The TRIOVENT Regulus channel heater is also worth mentioning. It looks extremely stylish and is very easy to control. The heater's power depends on the gear setting. This solution allows you to save money, but also ensures comfort of use. It is also worth paying attention to the tightness of the water system, as well as the exceptionally long service life, which can be up to several dozen years. Importantly, the heater ensures low heat inertia, but it can also be installed in the floor between ceilings.
Top 3: Channel heater QUATTROVENT 100/250/300/230V, L=2750 Regulus
Our list of Regulus radiators also includes the QUATTROVENT 100/250/300/230V L=2750 Regulus channel radiator .
 It is characterized by low mass and low thermal inertia, which determines its high heating precision, which helps to achieve thermal comfort. It works really efficiently even at low supply temperatures. It is resistant to both variable and high pressure. This solution allows you to save space, which was previously occupied by wall radiators - it is worth considering such an option.